Current Version: V1.50 - Updated On: 11/03/2007
Script Type: Ship Upgrade
Requires EMP (EMP adds the required wares to the game)
View Forum Page (Egosoft Offical Site)
The script adds a few extra upgrades for your ship that allows you to jump to sectors and positions without the need for Energy. Once installed, you will have various commands in your command console to use them.
Upgrades can be bought from all good Argon Equipment docks as well as the Goner Temple.
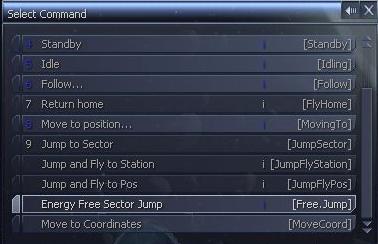
To perform an energy free jump, you first need to have either the Advanced jumpdrive, or the standard jumpdrive and Jumpdrive Energy Generator installed. Then you goto the command console of the ship you wish to jump and goto the navigation menu. The energy free jump command will be found here.
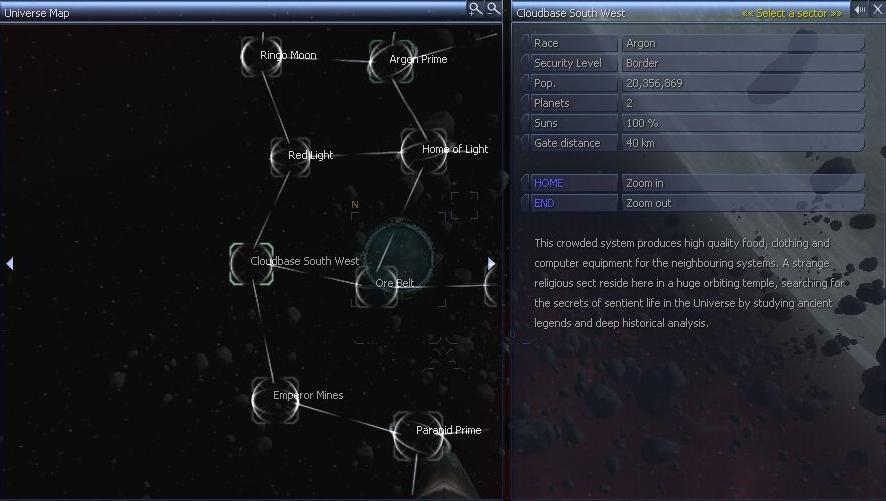
Selecting this will then bring up the sector map to select which sector to jump to.
To jump to any position in a sector you need to the Advanced Jumpdrive and the Jumpdrive Targetting Scanners. When installed you will have a new command in your navigation command console to jump to position.
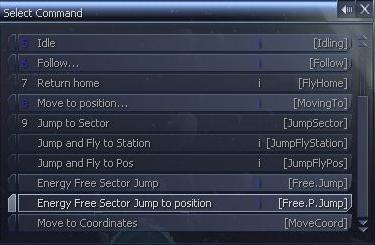
Selecting this command will then ask you to select the position to jump. This first input is the sector you wish to jump to, once selected the sector map will open up to select the position to jump to.
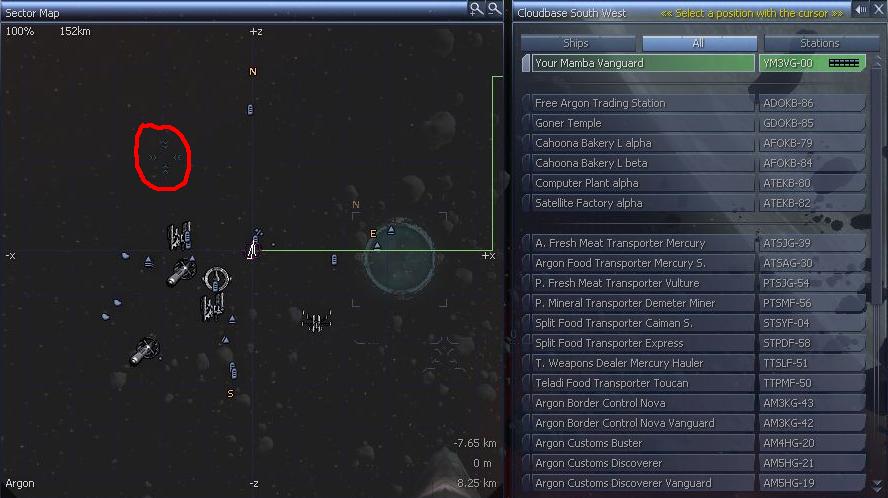
You use the number pad keys, 2, 4, 6 and 8 to move the cursor to the position you wish to jump to. The cursor is highlighted in red above. Once selected you will then jump to that sector and to that position you selected.
There are 2 hotkeys available for you to use with the Advanced Jumpdrive and the Jumpdrive Targetting Scanners. They allow you to store and jump to a set position at thep ush of a button. First of all, you need to assign the hotkeys in the controls menu. The hotkeys are found at the bottom of the Interface Tab.
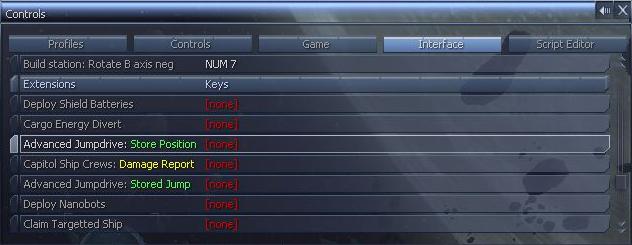
The first hotkey, the "Store Position" will allow you to save your current position. Then when you use the 2nd hotkey, the "Stored Jump", you will jump to the position that you had previously stored.
The Auto Jump command is used to intercept any normal ship commands that will make your ship travel to a distance sector and cause the Advanced Jumpdrive to kick in and jump you straight thier. IE, you could use the standard navigation command, "Dock At", and normally, the auto pilot will fly you to the sector the station is in then dock you at the station, with the auto jump command enabled, the Advanced Jumpdrive will jump you to the sector then continue to dock you at the station without having to fly thee first. You must have the Advanced Jumpdrive installed to use the Auto Jump, it doesn't work with the normal jumpdrive and energy generator.
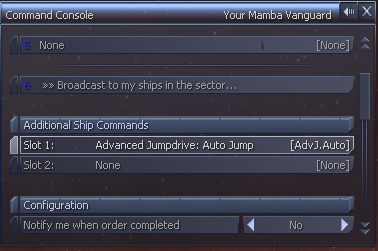
The auto jump command is found in the Ships Additional Command Slots, and requires the use of an empty slot while running.
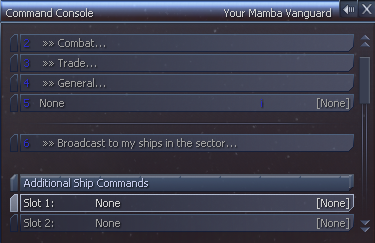
To activate it, simply goto your ships additional commands and select the "Advanced Jumpdrive: Auto Jump" command.

Once selected, it will run permantly on your ship and take up one of your slots, to disable it, you can select the slot its running in, and select the command "None".
When unisntalling from the Plugin Manager, you need to run the game after uninstalling so the unisntall scripts can run and remove everything from the game. After running the game, use the option in the Plugin Manager to remove these unisntall scripts.
8.1 Jump Scripts Replacement
This addon replaces the standard jump scripts to allow ships to use the Advanced Jumpdrive for Energy Free jumps. This allows any other scripts to make use of the advanced jumpdrive as well.